Add CMS Element
Overview
This guide explains how to create a new CMS element using the Meteor Admin SDK. The example plugin is named SwagBasicAppCmsElementExample, following the naming conventions used in other guides.
Prerequisites
- Familiarity with creating Plugins or Apps
- Familiarity with creating custom admin components
- Understanding of the Meteor Admin SDK
INFO
This example uses TypeScript, which is recommended but not required to develop Shopware.
Creating your custom element
Similar to creating a new custom element via plugin, this guide describes how to create a new custom element via an app. Creating a new element requires the Meteor Admin SDK.
In this example, you will build a scenario where a shop manager can configure a link to display a Dailymotion video.
Target structure
You can choose your preferred approach when creating apps, as everything is loaded via iFrame. However, Shopware recommends using a full Vue.js approach.
When the extension is complete, the file structure will look like this:
// <plugin root>/src/Resources/app/administration/src
├── base
│   └── mainCommands.ts
├── main.ts
├── viewRenderer.ts
└── views
    └── swag-dailymotion
        ├── swag-dailymotion-config.ts
        ├── swag-dailymotion-element.ts
        └── swag-dailymotion-preview.ts
Initial loading of components
The entry point is the main.ts file:
// Prior to 6.7
import 'regenerator-runtime/runtime';
import { location } from '@shopware-ag/meteor-admin-sdk';

// Only execute extensionSDK commands when
// it is inside an iFrame
if (location.isIframe()) {
    if (location.is(location.MAIN_HIDDEN)) {
        // Execute the base commands
        import('./base/mainCommands');
    } else {
        // Render different views
        import('./viewRenderer');
    }
}// 6.7 and above (inside meteor-app folder)
import 'regenerator-runtime/runtime';
import { location } from '@shopware-ag/meteor-admin-sdk';
if (location.is(location.MAIN_HIDDEN)) {
// Execute the base commands
import('./base/mainCommands');
} else {
// Render different views
import('./viewRenderer');
}This is the main file, which is executed first and functions as the entry point.
Use if(location.is(location.MAIN_HIDDEN)) to load the main commands, which are defined in the mainCommands.ts file. This will only be used to load logic, but not templates into the Administration.
Lastly, the else case will be responsible for specific loading of views via viewRenderer.ts. This is where the view templates will be loaded.
Loading all required templates
Next, create the viewRenderer.ts file, which loads the three required files for a CMS element:
swag-dailymotion-config.ts, which will handle the content of the CMS element configurationswag-dailymotion-element.ts, which represents the actual target element in the CMSswag-dailymotion-preview.ts, which is responsible for the preview, when selecting the CMS element in its selection screen
Observe that every file is named according to the component and prefixed with swag-dailymotion, (vendor prefix) to ensure no other developer accidentally chooses the same name.
The following example shows how component loading via viewRenderer.ts is implemented:
import Vue from 'vue';
import { location } from '@shopware-ag/meteor-admin-sdk';

// watch for height changes
location.startAutoResizer();

// start app views
const app = new Vue({
    el: '#app',
    data() {
        return { location };
    },
    components: {
        'SwagDailymotionElement':
            () => import('./views/swag-dailymotion/swag-dailymotion-element'),
        'SwagDailymotionConfig':
            () => import('./views/swag-dailymotion/swag-dailymotion-config'),
        'SwagDailymotionPreview':
            () => import('./views/swag-dailymotion/swag-dailymotion-preview'),
    },
    template: `
        <SwagDailymotionElement
            v-if="location.is('swag-dailymotion-element')"
        ></SwagDailymotionElement>
        <SwagDailymotionConfig
            v-else-if="location.is('swag-dailymotion-config')"
        ></SwagDailymotionConfig>
        <SwagDailymotionPreview
            v-else-if="location.is('swag-dailymotion-preview')"
        ></SwagDailymotionPreview>
    `,
});
Really straightforward, isn't it? As you probably know from Vue.js's Options API, you just need to load, register and use the Vue.js component to make them work.
What's especially interesting here is the use of the location object. This is a main concept of the Meteor Admin SDK, where Shopware provides dedicated locationIds to offer you places to inject your templates into. For further information on that, it is recommended to take a look at the documentation of the Meteor Admin SDK to learn more about its concepts.
In your case, we will get your own auto-generated locationIds, depending on the name of your CMS element and suffixes, such as -element, -config, and -preview.
Those will be available after registering the component, which we will do in the following chapter.
Registering a new element
For this step, go to mainCommands.ts, as registering CMS elements should be done in a global scope.
import { cms } from '@shopware-ag/meteor-admin-sdk';

const CMS_ELEMENT_NAME = 'swag-dailymotion';
const CONSTANTS = {
    CMS_ELEMENT_NAME,
    PUBLISHING_KEY: `${CMS_ELEMENT_NAME}__config-element`,
};

void cms.registerCmsElement({
    name: CONSTANTS.CMS_ELEMENT_NAME,
    label: 'Dailymotion video',
    defaultConfig: {
        dailyUrl: {
            source: 'static',
            value: '',
        },
    },
});

export default CONSTANTS;
At first, you import the Meteor Admin SDK's CMS object used for cms.registerCmsElement to register a new element.
That is all about what is required to register your CMS element. As a best practice, it is recommended to create a constant for the CMS element name and the publishing key. This makes it easier to maintain and keep track of changes. The publishing key can be predefined since the name must be a combination of CMS element name and the __config-element suffix as shown above.
Templates and communication with the Administration
The remaining files are the components inside the views folder. As with typical CMS element loading, create a folder with the full component name containing three files as shown below:
// <plugin root>/src/Resources/app/administration/src
views
└── swag-dailymotion
    ├── swag-dailymotion-config.ts
    ├── swag-dailymotion-element.ts
    └── swag-dailymotion-preview.ts
You can vary the structure of swag-dailymotion's contents and create folders for each of the three. However, for simplicity, use single file components.
The config file
The following section describes each file, starting with swag-dailymotion-config.ts:
import Vue from 'vue'
import { data } from "@shopware-ag/meteor-admin-sdk";
import CONSTANTS from "../../base/mainCommands";

export default Vue.extend({
    template: `
        <div>
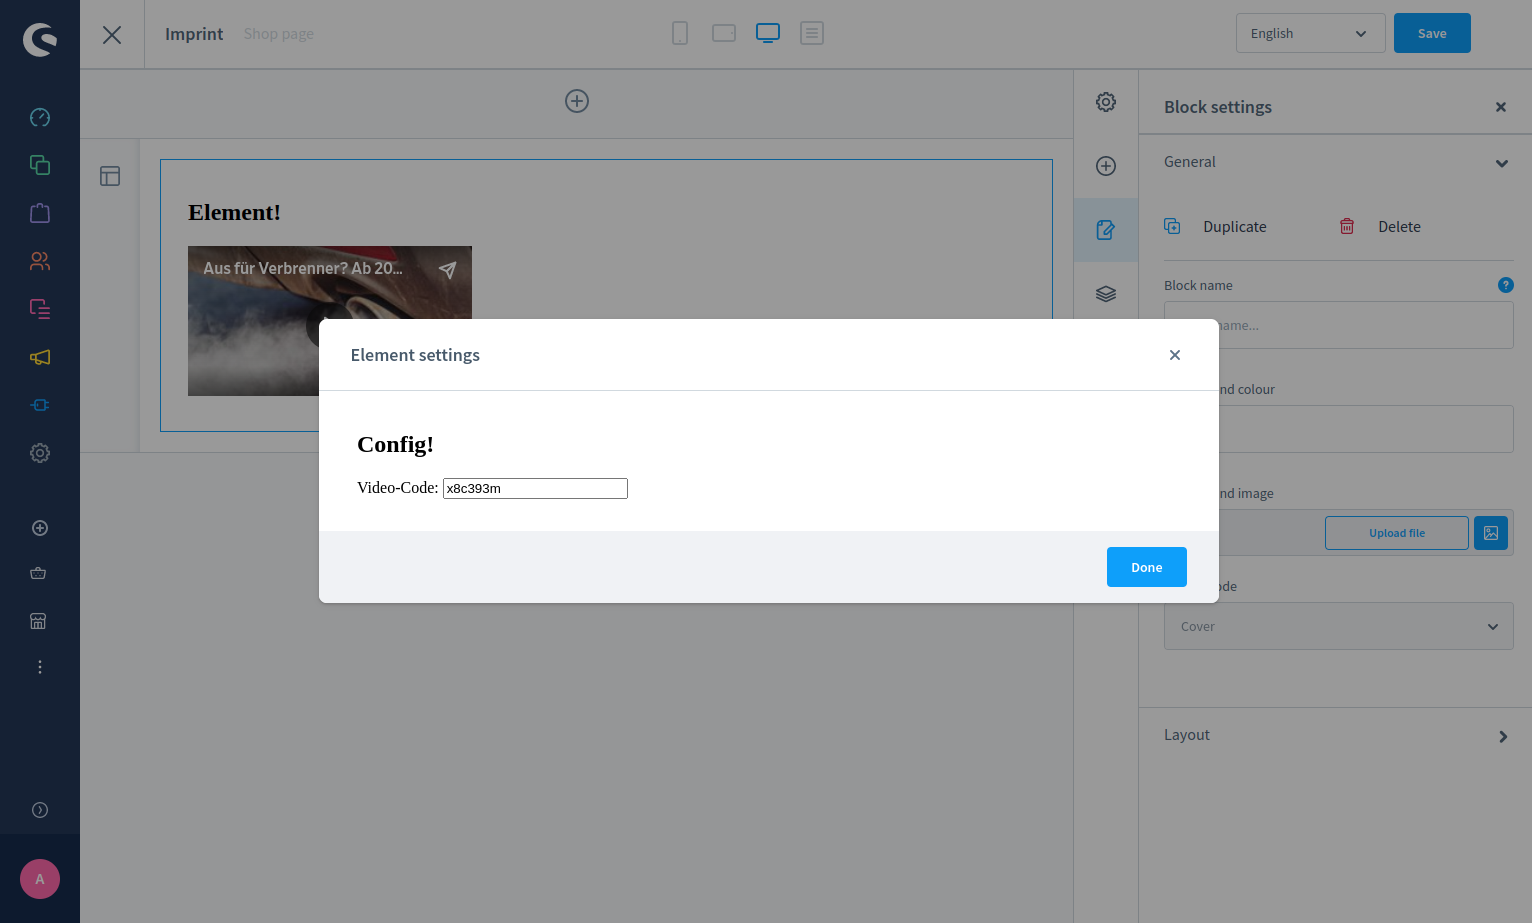
          <h2>
            Config!
          </h2>
          Video-Code: <input v-model="dailyUrl" type="text"/><br/>
        </div>
    `,

    data(): Object {
        return {
            element: null
        }
    },

    computed: {
        dailyUrl: {
            get(): string {
                return this.element?.config?.dailyUrl?.value || '';
            },

            set(value: string): void {
                this.element.config.dailyUrl.value = value;

                data.update({
                    id: CONSTANTS.PUBLISHING_KEY,
                    data: this.element,
                });
            }
        }
    },

    created() {
        this.createdComponent();
    },

    methods: {
        async createdComponent() {
            this.element = await data.get({ id: CONSTANTS.PUBLISHING_KEY });
        }
    }
});
This file is the config component used to define every type of configuration for the CMS element. Most of the code will be common for experienced Shopware 6 developers, so here are some important highlights:
- Import
datafrom the Meteor Admin SDK, which is required for data handling between this app and Shopware - The
elementvariable contains the typical CMS element object and is also used to manage the element configuration you want to edit - The
publishingKeyis used to tell the Meteor Admin SDK in Shopware what piece of information you want to fetch. In this case, you need theelementdata
So, now you need a simple input field to get a dailyUrl for the Dailymotion video to be displayed. For that, first fetch the element via data.get() as seen in createdComponent and then link it to the computed property dailyUrl with getters and setters to mutate it. Using data.update({ id, data }) you provide the publishing key id as a target and data for the data you want to save in Shopware.
With these small additions to typical CMS element behavior, you have already done with the config modal.

The element file
Now let's have a look at the result of swag-dailymotion-element.ts:
import Vue from 'vue'
import { data } from "@shopware-ag/meteor-admin-sdk";
import CONSTANTS from "../../base/mainCommands";

export default Vue.extend({
    template: `
        <div>
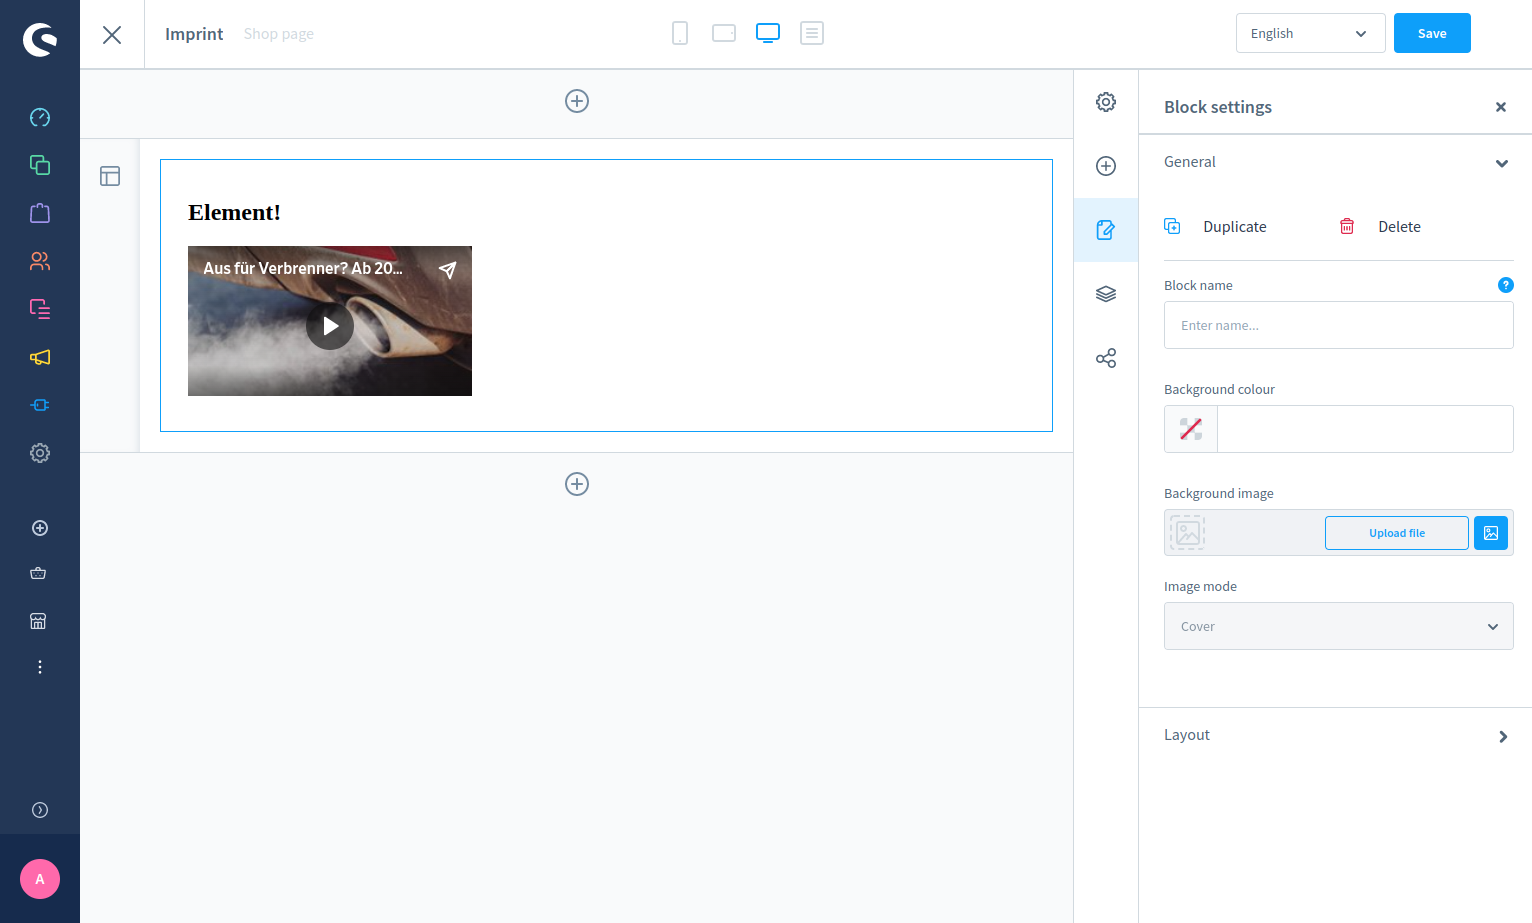
            <h2>
              Element!
            </h2>
            <div class="sw-cms-el-dailymotion">
                <div class="sw-cms-el-dailymotion-iframe-wrapper">
                    <iframe
                        frameborder="0"
                        type="text/html"
                        width="100%"
                        height="100%"
                        :src="dailyUrl">
                    </iframe>
                </div>
            </div>
        </div>
    `,

    data(): { element: object|null } {
        return {
            element: null
        }
    },

    computed: {
        dailyUrl(): string {
            return `https://www.dailymotion.com/embed/video/${this.element?.config?.dailyUrl?.value || ''}`;
        }
    },

    created() {
        this.createdComponent();
    },

    methods: {
        async createdComponent() {
            this.element = await data.get({ id: CONSTANTS.PUBLISHING_KEY });
            data.subscribe(CONSTANTS.PUBLISHING_KEY, this.elementSubscriber);
        },

        elementSubscriber(response: { data: unknown, id: string }): void {
            this.element = response.data;
        }
    }
});
Here, you have the main rendering logic for the Administration's CMS element. This file shows what your element will look like when it's done. So besides a template and the computed dailyUrl, used to correctly load the Dailymotion video player, the only interesting part is the createdComponent method.
It initially fetches the element data, as you've already seen it in the config file. After that, using data.subscribe(id, method) it subscribes to the publishing key, which will update the element data automatically if something changes. It doesn't matter if the changes originate from our config modal outside Shopware or from somewhere else inside Shopware.

The preview file
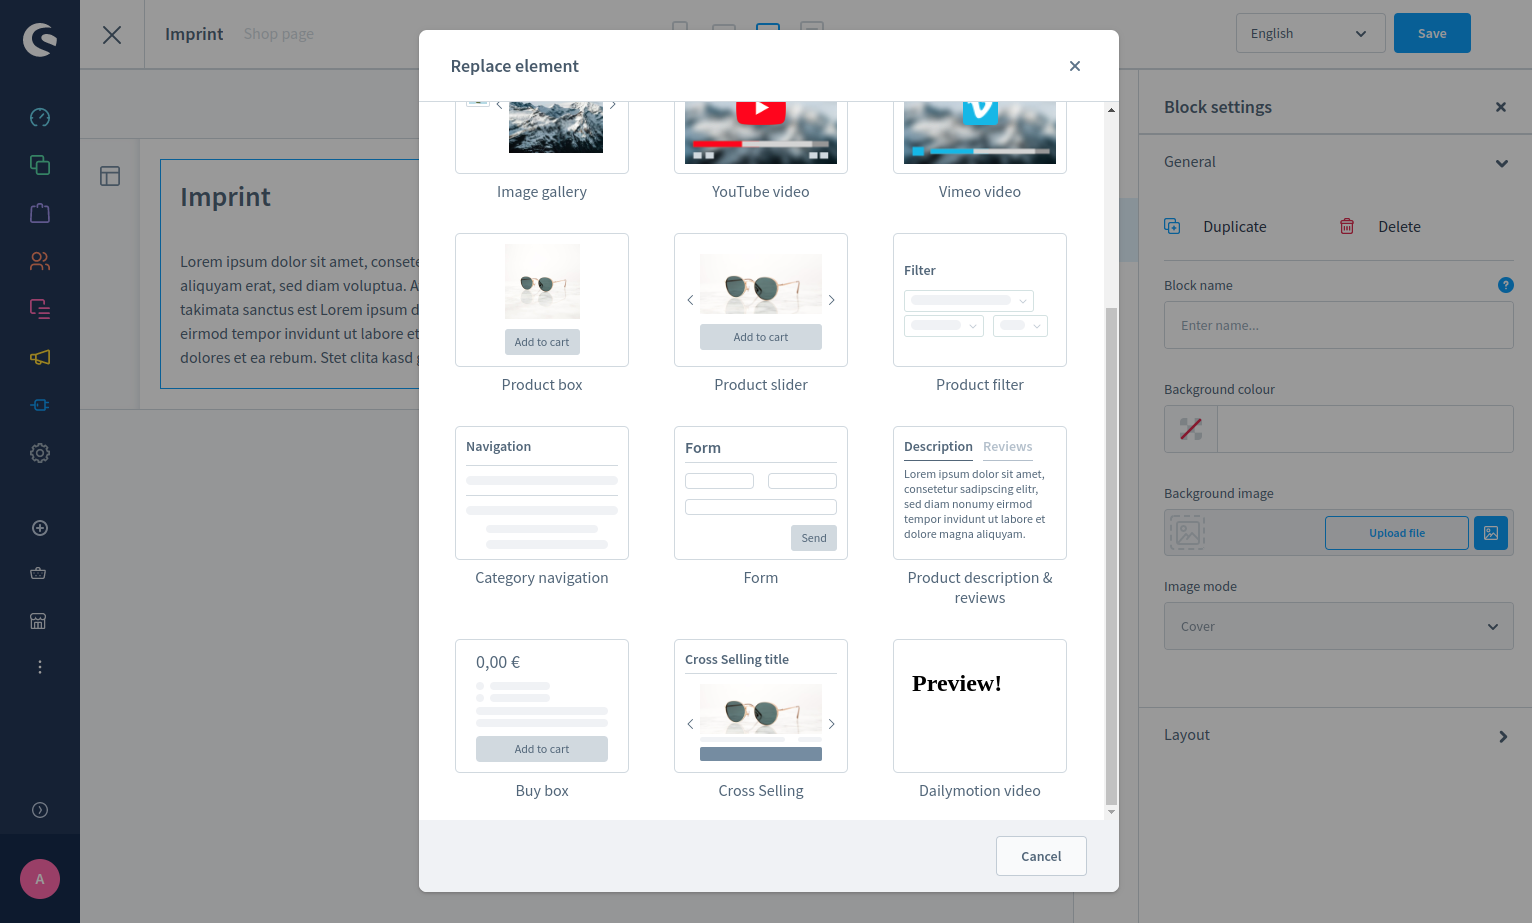
Lastly, have a look at swag-dailymotion-preview.ts. In most cases, this file contains minimal logic, as it is only used for the preview when selecting a CMS element for your block. It is common to show an example preview, a skeleton of the result, or just the Dailymotion logo. The following code is sufficient for this example:
import Vue from 'vue'

export default Vue.extend({
    template: `
        <h2>
          Preview!
        </h2>
    `,
});
Storefront implementation
After completing the admin implementation, you also need a storefront representation of your blocks. This is similar to typical plugin development, except for the path. All storefront templates must follow this pattern: <app-name>/Resources/views/storefront/element/<elementname>.html.twig
For more details, see the guide on CMS element development for plugins. Below is an example of how your storefront template (swag-dailymotion/Resources/views/storefront/element/cms-element-swag-dailymotion.html.twig) could look:
{% block element_swag_dailymotion %}
<div class="cms-element-swag-dailymotion" style="height: 100%; width: 100%">
    {% block element_dailymotion_image_inner %}
    <div class="cms-el-swag-dailymotion">
        <div style="position:relative; padding-bottom:56.25%; height:0; overflow:hidden;">
            <iframe style="width:100%; height:100%; position:absolute; left:0px; top:0px; overflow:hidden"
                    src="https://www.dailymotion.com/embed/video//{{ element.config.dailyUrl.value }}"
                    frameborder="0"
                    type="text/html"
                    width="100%"
                    height="100%">
            </iframe>
        </div>
    </div>
    {% endblock %}
</div>
{% endblock %}