Realtime Service - Mercure
INFO
Symfony provides a straightforward component, built on top of the Mercure protocol, specifically designed for this class of use cases. Mercure is an open protocol designed from the ground up to publish updates from server to client. It is a modern and efficient alternative to timer-based polling and to WebSocket.
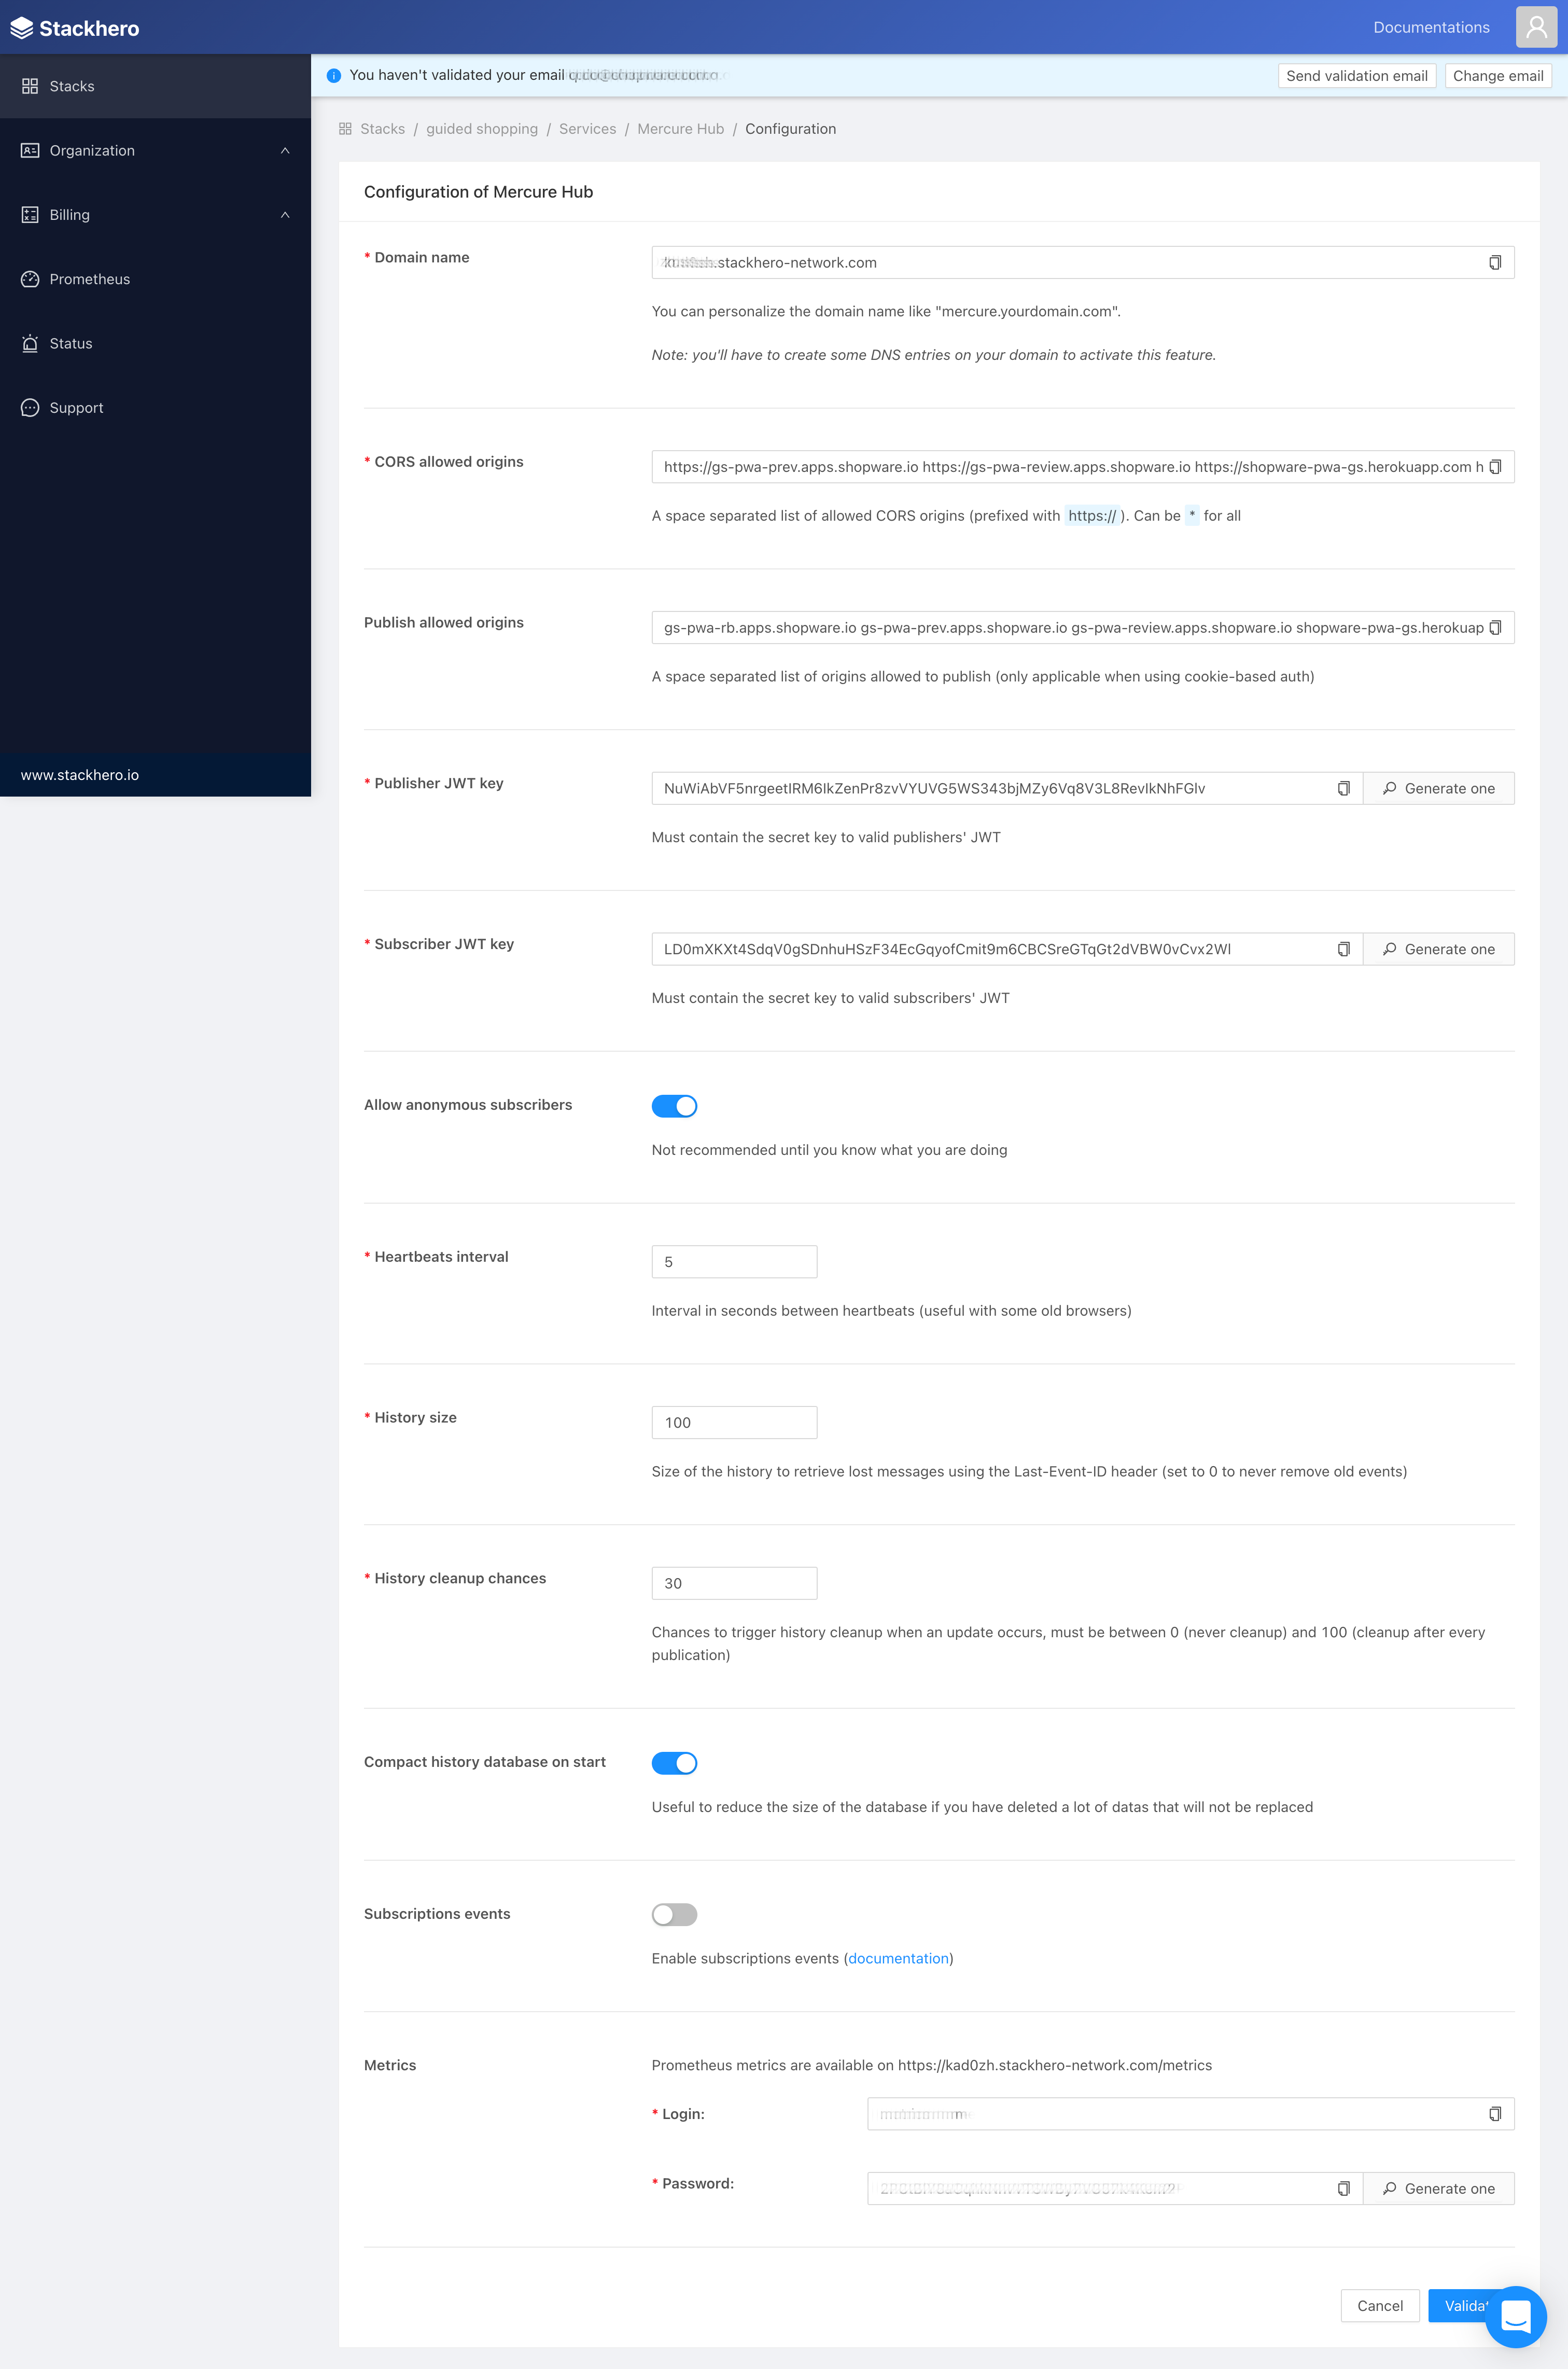
Mercure general settings
Detailed below is the minimum configuration needed for a working stack apart from project-specific CMS configurations.
- Set up CORS allowed origins - In our case, it would be the domain where the Shopware Frontends is hosted and available. For instance: https://dsr-frontends.com (frontend).
- Set up publish allowed origins - The domains that request the Mercure service must be added to publish allowed origins or else it gets rejected. For instance (HTTP protocol must not be included): shopware-pwa-gs.herokuapp.com (frontend) and pwa-demo-api.shopware.com(backend - API).
- Set up the publisher (JWT) key - Set whatever you want.
- Set up the subscriber (JWT) key - Set whatever you want.
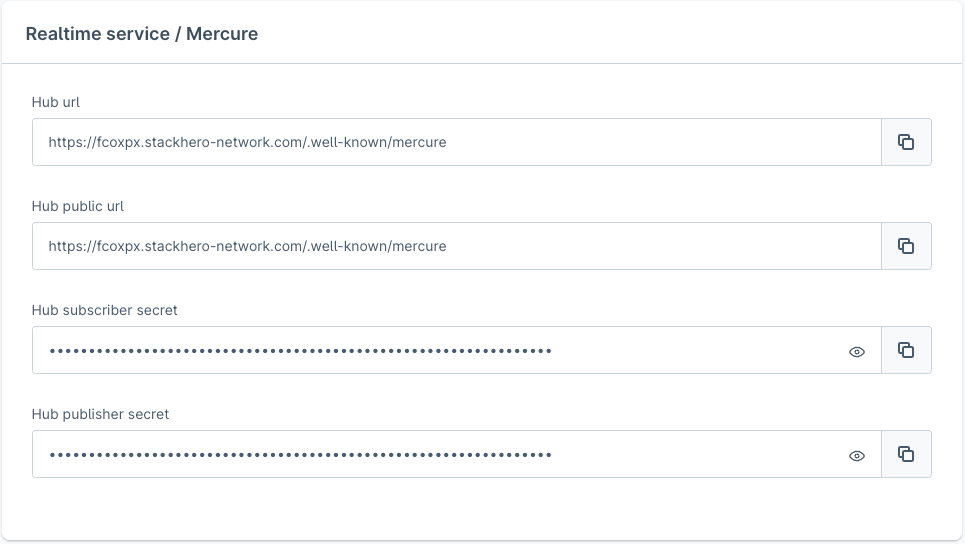
There are 4 main pieces of information from Mercure Hub you have to get:
- Hub url - The hub URL.
- Hub public url - The hub public URL, normally it's the same as the hub URL.
- Hub subscriber secret - The JWT key used for authenticating subscribers
- Hub publisher secret - The JWT key used for authenticating publishers
Setup
There are different ways to set up Mercure as listed below:
Setup via Stackhero (Recommended)
INFO
💡 We tested the service provided by StackHero. Depending on the expected traffic, you can easily switch between the plans. For a small demo among a few people at the same time, the “Hobby” plan is sufficient.
- Create the Stackhero account.
- Access the dashboard.
- In the Stacks menu item, create a new stack with the Mercure Hub service.
- When creating a stack successfully, tap into the Configure button.
- On this page, it's easy to find the Mercure general settings, copy all the necessary information, and paste it into the proper inputs of the configuration page.
Setup via Docker
The docker image can be found at dunglas/mercure. It allows you to use the following env variables to configure Mercure.
WARNING
Use different publisher and subscriber keys for security reasons.
- MERCURE_PUBLISHER_JWT_KEY: your-256-bit-publisher-key
- MERCURE_SUBSCRIBER_JWT_KEY: your-256-bit-subscriber-key
- MERCURE_EXTRA_DIRECTIVES: |-
   cors_origins "https://my-pwa-shop.com https://en.my-pwa-shop.com"
   anonymous 0
   ui 1
You can also configure it like the self-installed version via the Caddyfile.
// Sample Caddyfile
{
    # Debug mode (disable it in production!)
    debug
    # HTTP/3 support
}
:80
log
route {
    redir / /.well-known/mercure/ui/
    encode gzip
    mercure {
        # Enable the demo endpoint (disable it in production!)
        demo
        # Publisher JWT key
        publisher_jwt MySecret
        # Subscriber JWT key
        subscriber_jwt MySecret
        # CORS
        cors_origins http://localhost:3000 http://localhost:8080 http://shopware.test http://7779-91-90-160-158.ngrok.io
        publish_origins localhost:3000 localhost:8080 shopware.test 7779-91-90-160-158.ngrok.io
        # Allow anonymous subscribers (double-check that it's what you want)
        anonymous
        # Enable the subscription API (double-check that it's what you want)
        subscriptions
    }
    respond "Not Found" 404
}
Self-host setup
The installation guide explains all the steps that are required for installing the Mercure.
mercure {
...
publisher_jwt my-publisher-key HS256
subscriber_jwt my-subscriber-key HS256
cors_origins "https://my-pwa-shop.com https://en.my-pwa-shop.com"
demo 0
ui 0
...
}