MAMP
DANGER
This approach is no longer recomended. It is kept here as a reference.
Overview
For quick and easy installation, you can also use MAMP on Mac.
Prerequisites
As a first step, make sure you installed MAMP beforehand. You can download MAMP on this site.
Preparation
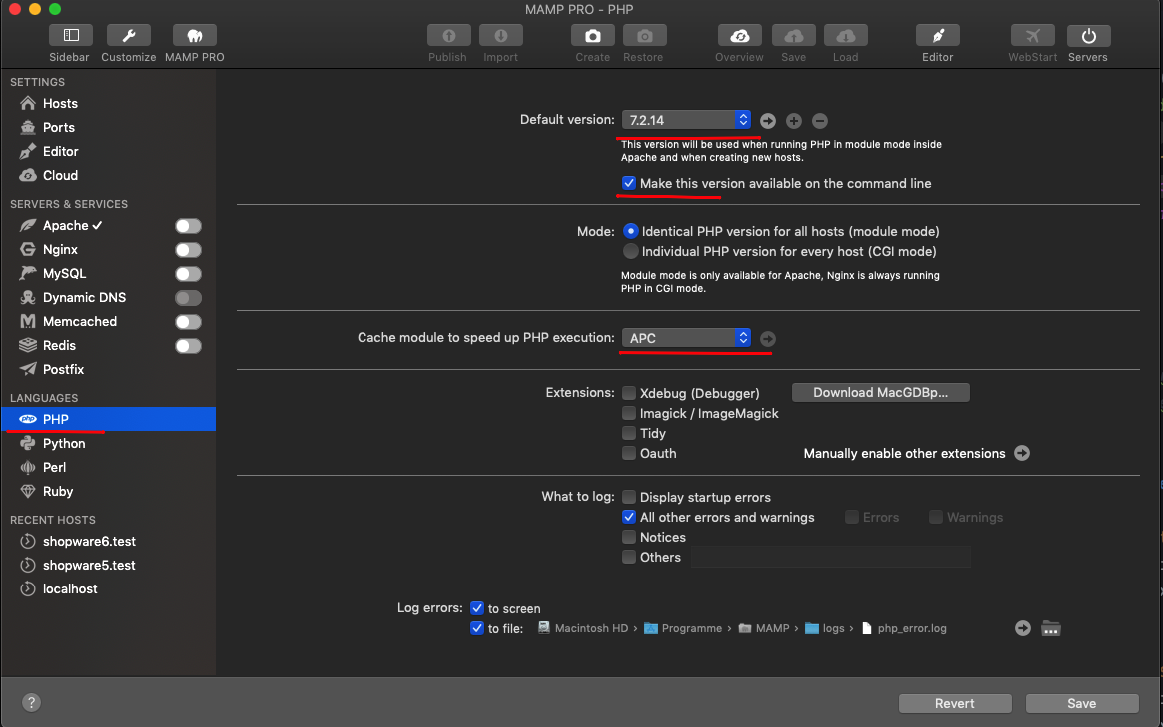
Configure PHP settings
First, you have to modify the PHP settings inside MAMP, as seen in the following screenshot:
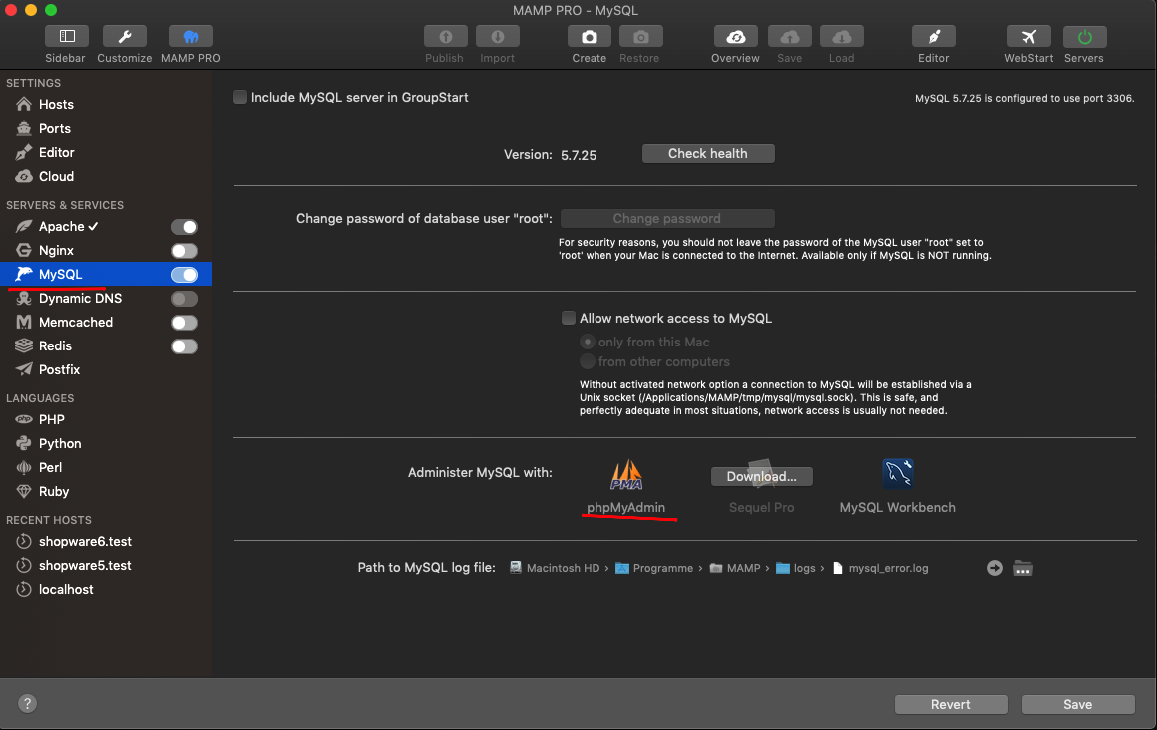
Next, start the mysql webserver-service with the toggle buttons on the left side in the MAMP management console.
Prepare MySQL user and database
- Open the MySQL Tab on the left side and click on the PhpMyAdmin icon. In case the icon is grayed out, check if the mysql and webserver services are running.
Inside PhpMyAdmin, switch to the user account management on the top menu and click add new user.
Choose a username (e.g., shopware) and a password and set the option Create database with same name and grant all privileges. Set the option Check all in the Global privileges card. Also, all checkboxes in this card should be checked.
Finish this step by clicking GO.
Global usage
Next, you must ensure MAMP php binary is used globally on your CLI. Therefore, execute the following commands:
which php
# /Applications/MAMP/bin/php/php7.2.14/bin/php < should be displayed
# IF NOT
vim ~/.bash_profile
export PATH=/Applications/MAMP/bin/php/php7.2.14/bin:$PATH
# :wq to save the file
source ~/.bash_profile
INFO
The folder used in PATH (PATH=/Applications/MAMP/bin/php/php7.2.14/bin:$PATH) may change. Please look in the php folder for its current name.
Then you need to make sure MAMP mysql binary is used globally on your CLI:
which mysql
# /Applications/MAMP/Library/bin/mysql < should be displayed
# IF NOT
vim ~/.bash_profile
export PATH=/Applications/MAMP/Library/bin:$PATH
# :wq to save the file
source ~/.bash_profile
Install brew
It is handy to use brew as a package manager. So we recommend you install brew. Please open the terminal application again and run the command stated below:
/usr/bin/ruby -e "$(curl -fsSL https://raw.githubusercontent.com/Homebrew/install/master/install)"Install npm / node
The next step is installing NodeJS and NPM. Therefore you need to leave the terminal application open and use brew to install the node:
brew install node@12Install Composer
To install Composer, please open the terminal application and execute the following command:
brew install composerCheckout Shopware
Before you are able to set up Shopware, you need to checkout Shopware's repositories. This is explained in the "Preparatory steps" of the Installation overview. guide. Nevertheless, below you see a brief summary of this process:
# Choose your own directory
cd ~/PhpstormProjects/
mkdir shopware
cd shopware
git clone https://github.com/shopware/development.git
cd development
git clone https://github.com/shopware/platform.git
Shopware 6 setup in MAMP
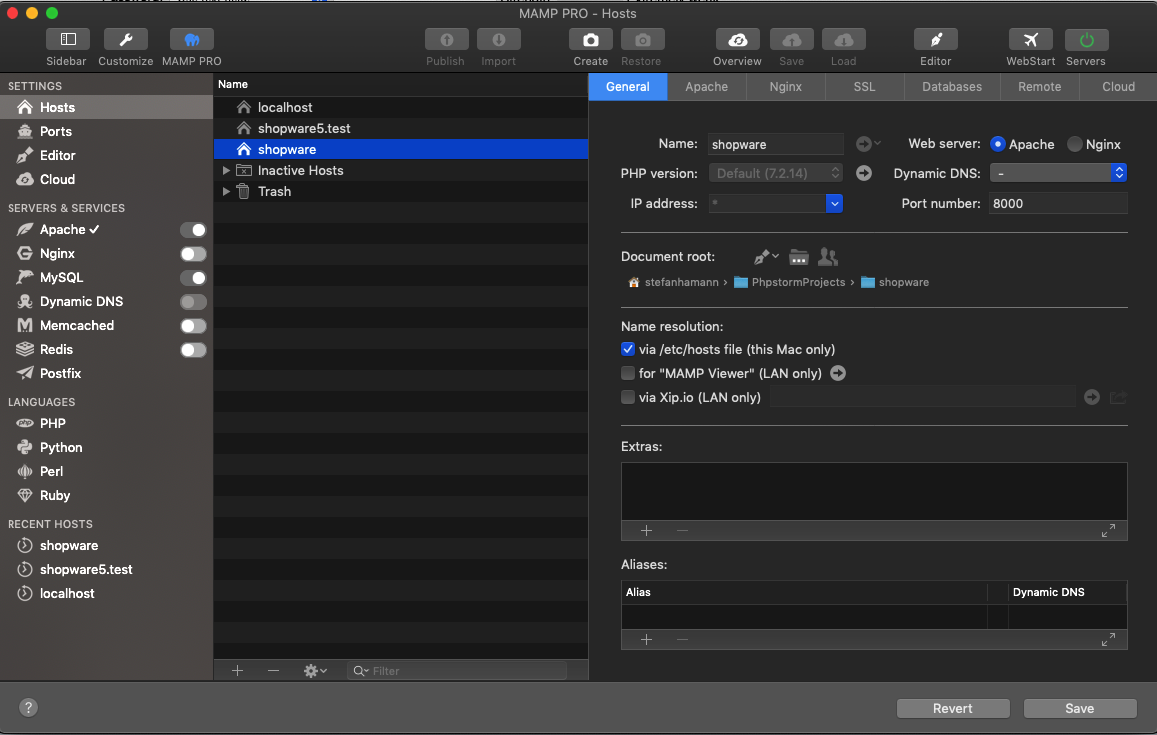
First, add a new host in MAMP:
- Hostname = shopware
- Port = 8000
- Document Root = Browse for the public directory inside the new directory that you used before (e.g.,/PhpstormProjects/shopware/development/public)
As a next step, change the installation settings:
# Inside the shopware installation directory (e.g.  /PhpstormProjects/shopware/development)
bin/setup
You will be prompted to enter specific information. In short:
- Application environment: Just hit enter to apply the default
dev. - URL to your /public folder:
http://shopware:8000. - Database host: Just hit enter to apply the default
localhost. - Database port: Just hit enter to apply the default
3306. - Database name: Enter the name of your database that you created earlier,
shopwarewas suggested. - Database user: Enter the name of your MySQL user that you created previously.
- Database password: Enter the password of the new MySQL user.
Afterwards a file called .psh.yaml.override is created, which contains all the information you just entered.
Start Shopware 6 setup
# Inside the shopware installation directory (e.g. /PhpstormProjects/shopware/development)
./psh.phar install
After that the setup is done. You can now access your Shopware 6 installation using the following URLs:
- Storefront: http://shopware:8000
- Admin: http://shopware:8000/admin (User: admin, password: shopware)
Troubleshooting
There are cases when the Administration is not built correctly and has error messages similar to these:
ERROR in foobar/vendor/shopware/storefront/Resources/app/administration/src/main.js Module Error (from ./node_modules/eslint-loader/index.js):
✘ https://google.com/#q=import%2Fno-unresolved Casing of ./modules/sw-theme-manager does not match the underlying filesystem
foobar/vendor/shopware/storefront/Resources/app/administration/src/main.js:1:8✘ https://google.com/#q=import%2Fno-unresolved Casing of ./extension/sw-sales-channel/page/sw-sales-channel-detail does not match the underlying filesystem
foobar/vendor/shopware/storefront/Resources/app/administration/src/main.js:3:8✘ https://google.com/#q=import%2Fno-unresolved Casing of ./extension/sw-sales-channel/view/sw-sales-channel-detail-theme does not match the underlying filesystem
foobar/vendor/shopware/storefront/Resources/app/administration/src/main.js:4:8✘ https://google.com/#q=import%2Fno-unresolved Casing of ./init/api-service.init does not match the underlying filesystem
foobar/vendor/shopware/storefront/Resources/app/administration/src/main.js:6:8
The underlying problem is that Mac supports case-insensitive paths but not the tools that build the administration. Therefore, make sure to execute the commands in a context where the pwd is written in the correct case.
✅ Ok: /Users/shopware/Code/shopware-platform
❌ Not ok: /users/shopware/code/Shopware-Platform
Next steps
As you successfully installed Shopware, you may want to start writing your own plugin. Head over to Plugin base guide to get a grip on that topic.